
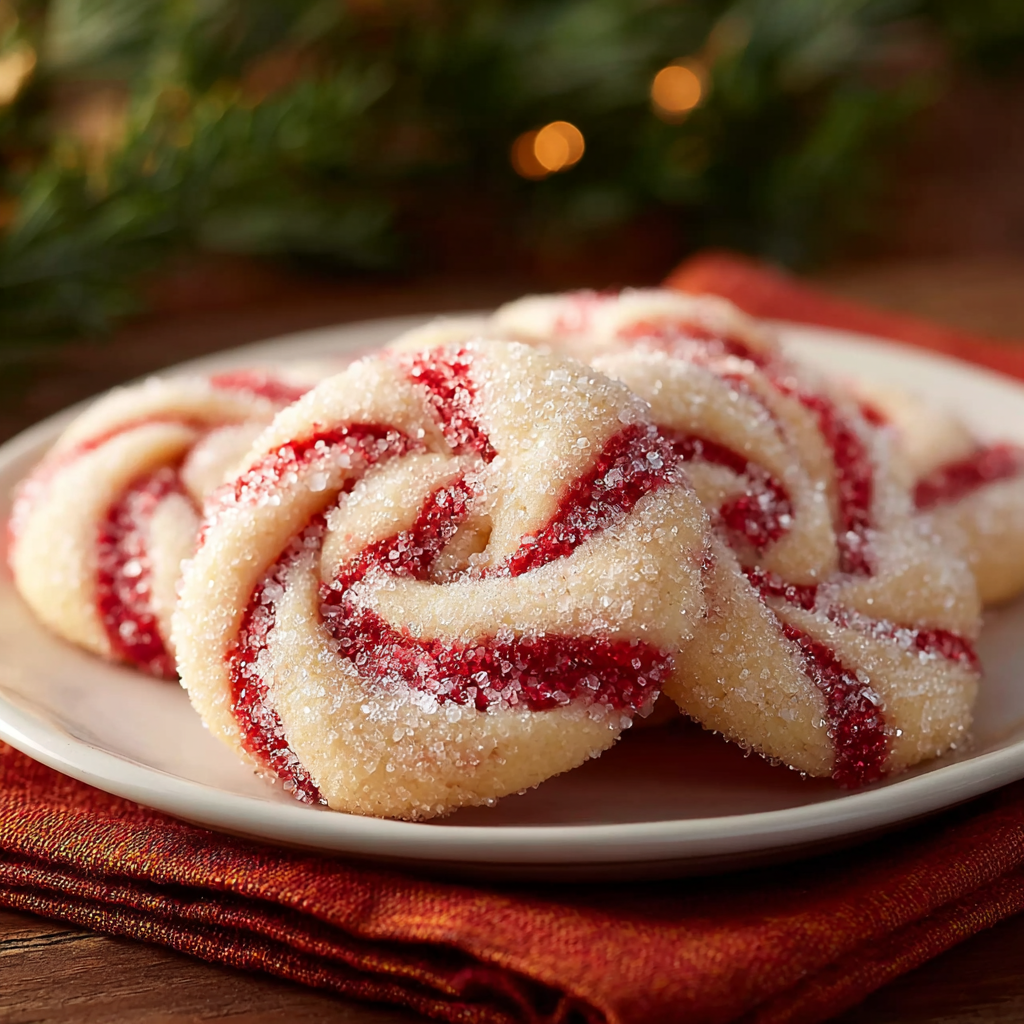
Peppermint Swirl Cookies

Buttery sugar cookies with a festive peppermint swirl, finished with a sparkling crunch—perfect for the holidays or anytime you want a minty treat.
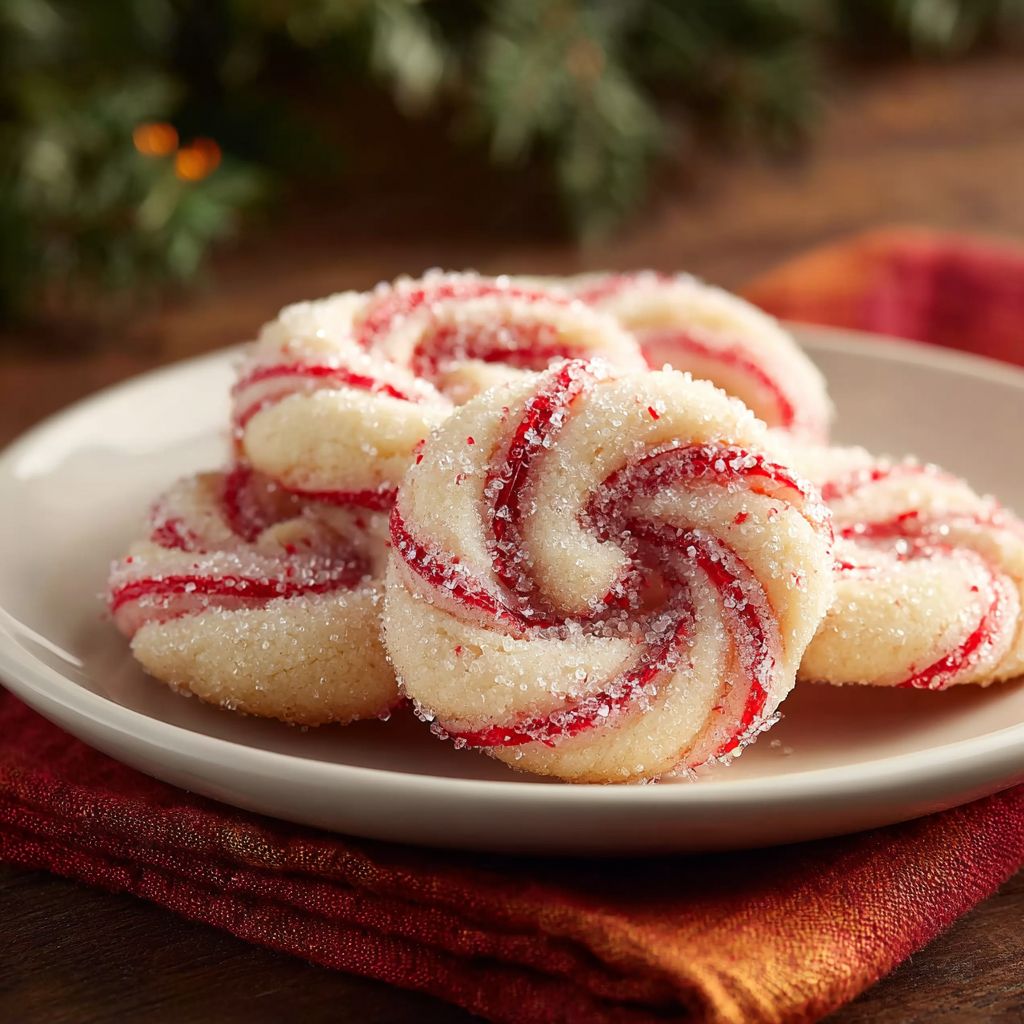
This recipe for Peppermint Swirl Cookies is one of those cheerful, nostalgic bakes that instantly transports me back to cold afternoons baking with my grandmother. I first discovered the swirl technique in a community bake sale recipe card years ago, and after a few adjustments—more butter for tenderness, a touch of peppermint extract for a bright finish—it became a holiday staple. The combination of a tender, buttery cookie base and a refreshing peppermint ribbon makes these cookies both comforting and lively: the texture is soft at the center with a delicate snap at the edge and a light crunch from the coarse sugar or crushed candy coating.
What makes this approach special is how forgiving it is: you can prepare the dough ahead, shape the swirl logs in advance, and chill them until baking time. The visual impact of the red swirl against the pale cookie makes these ideal for gifting or a festive cookie tray. I often make a double batch and wrap stacks of six in parchment with a ribbon for neighbors. Every year my family asks for these first because they know the peppermint means the season has officially begun.
Why You'll Love This Recipe
- Ready in about 35 minutes from start to finish for a single active bake session; dough can be made ahead and chilled for convenience.
- Uses simple pantry staples: all-purpose flour, granulated sugar, butter—no specialty ingredients required except a small jar of red gel coloring.
- Visually striking with a classic red-and-white swirl that’s perfect for gifts and party trays; the coarse sugar or crushed candy adds a festive sparkle and texture contrast.
- Flexible technique: shape as logs and slice for classic rounds or press into a more rustic swirl for a handmade look—both yield dependable results.
- Make-ahead friendly: dough firms up in the refrigerator, so you can roll and slice over a couple of days, freeing up holiday oven time.
In my kitchen this recipe quickly proved its worth: neighbors compliment the balance of buttery cookie and peppermint brightness, and children love the red swirl. I’ve learned small tweaks—room-temperature butter, gentle folding to avoid overworking the dough, and using gel color for vibrant streaks—make a big difference to texture and appearance.
Ingredients
- All-purpose flour: 2 and 1/2 cups—choose a well-stored, unbleached flour for a clean flavor and predictable structure; spoon into the measuring cup and level for accuracy.
- Baking powder: 1 teaspoon—gives a gentle lift and a tender crumb without excessive spreading; ensure it’s fresh for best rise.
- Salt: 1/2 teaspoon—balances sweetness; kosher or fine table salt both work, but adjust if using a salted butter.
- Unsalted butter: 1 cup (2 sticks), softened—use European-style (82% fat) for extra richness or standard unsalted for dependable results; room temperature is key for creaming.
- Granulated sugar: 1 cup—provides sweetness and helps create a light, slightly crisp edge when baked.
- Egg: 1 large—adds structure and moisture; use room temperature for better emulsion.
- Vanilla extract: 1 teaspoon—adds depth; opt for pure vanilla for the cleanest flavor.
- Peppermint extract: 1 teaspoon—be conservative and taste the dough; peppermint can dominate, so start with the recipe amount and increase if desired.
- Red gel food coloring: A few drops—gel coloring gives vivid streaks without thinning the dough; brands like AmeriColor are reliable.
- Coating: 1/4 cup coarse sugar or crushed peppermint candies—adds sparkle and a pleasant crunch; crush candies in a zip bag with the flat side of a rolling pin.
Instructions
Preheat and prepare: Preheat the oven to 350°F (175°C). Line a baking sheet with parchment paper or silicone baking mats. Have measuring tools, bowls, and a sheet of plastic wrap ready—organization speeds the process and prevents overmixing. Cream butter and sugar: In a large bowl, beat the softened butter and granulated sugar together on medium speed until pale and fluffy, about 2 to 3 minutes. Scrape down the bowl once; properly creamed butter traps air that contributes to rise and tenderness. Incorporate egg and extracts: Add the egg, vanilla, and peppermint extract and beat until combined. The mixture should be smooth; if it looks curdled, beat briefly until it comes together—do not overmix. Combine dry ingredients: Whisk together the all-purpose flour, baking powder, and salt in a separate bowl. Add the dry mix to the butter mixture in two additions on low speed, mixing until just combined. Overworking develops gluten and leads to tougher cookies. Divide and color dough: Turn the dough out onto a lightly floured surface and divide it into two portions (roughly 60/40). Knead a few drops of red gel into the smaller portion until streaks form—do not fully homogenize the color; you want visible ribbons for the swirl effect. Form the swirl logs: Roll each portion into a log about 2 inches in diameter. Wrap both logs together side-by-side in plastic wrap, pressing gently so the colored dough lies alongside the plain dough, creating a swirl when sliced. Chill the wrapped logs for at least 1 hour or until firm. Slice, coat, and bake: Unwrap and slice the chilled log into 1/4- to 1/3-inch rounds. Lightly press each round into the coarse sugar or crushed peppermint candies, arranging on the prepared baking sheet about 1 inch apart. Bake 9–11 minutes until edges are set and the centers look slightly soft. Cool and finish: Let the cookies cool on the sheet for 3 minutes, then transfer to a wire rack to cool completely. The centers will firm up as they cool; allow at least 20 minutes before stacking or storing.
You Must Know
- Cookies store well in an airtight container at room temperature for up to 5 days; place parchment between layers to prevent sticking.
- Freeze unbaked logs for up to 3 months; slice from frozen and add a minute or two to the bake time.
- High in simple carbohydrates and fats—each cookie is best enjoyed as an occasional treat; consider portioning for gifting.
- Coarse sugar or crushed candy adds texture and seals the edge, preventing excessive chewiness—choose based on desired crunch.
My favorite aspect is how a little gel coloring and peppermint extract elevates a simple dough into something festive. At every cookie swap I bring these, someone asks for the secret—it's really the chilling step that creates clean slices and keeps the swirl defined. Family memories include my niece helping to press the candies, proudly handing each tray back to me for the oven.
Storage Tips
Store completely cooled cookies in an airtight container at room temperature for up to 5 days. For longer storage, freeze baked cookies in a single layer on a sheet tray until firm, then transfer to a freezer-safe container for up to 3 months. Thaw at room temperature for 30–60 minutes. For unbaked logs, wrap tightly in plastic and freeze up to 3 months—slice from partially thawed logs and bake directly, adding 1–2 minutes to the time. Use parchment or plastic separators between layers to prevent sticking and preserve the coated candy texture.
Ingredient Substitutions
If you want to reduce dairy, substitute unsalted vegan butter at a 1:1 ratio—texture will be similar though flavor slightly different. For an egg-free version, use a commercial egg replacer or 1/4 cup unsweetened applesauce, but expect a softer texture and less structure. If you prefer a less intense mint, reduce peppermint extract to 1/2 teaspoon or substitute with 1 teaspoon of orange zest for a peppermint-orange twist. For a gluten-free option, use a 1:1 gluten-free flour blend formulated for baking and chill the dough well to prevent crumbling.
Serving Suggestions
Serve these as part of a holiday platter with shortbread, ginger snaps, and plain sugar cookies for contrast. Pair with hot chocolate, mint tea, or fresh-brewed coffee—peppermint pairs especially well with dark chocolate, so add a few chocolate-dipped halves to the tray. Garnish with a light dusting of powdered sugar for a snow-dusted look or drizzle melted dark chocolate for a richer finish. These are also ideal for cookie gifting: stack six with parchment and tie with ribbon for a professional look.
Cultural Background
Mint and sugar confections have long been associated with winter celebrations in North America and Europe. The red-and-white swirl evokes candy canes, a tradition dating back to 19th-century Europe when mint sticks became popular in holiday customs. Transforming that flavor profile into a buttery cookie is a relatively modern twist that borrows the visual cues and bright mint notes to create a festive treat. Variations of peppermint cookies are common across holiday baking traditions, frequently appearing alongside gingerbread and fruitcakes.
Seasonal Adaptations
In winter, use crushed candy canes for a classic holiday crunch. For spring or Valentine’s Day, swap the red gel for pink and add a hint of lemon zest for brightness. Summer versions work well with a chocolate base—fold cocoa into the dough and use crushed peppermint for an adult mint-chocolate cookie. Adjust the extract levels when changing seasons: lighter mint in warmer months keeps the cookie refreshing rather than dominant.
Meal Prep Tips
Make a double batch and freeze half the dough logs for later—this saves time and oven energy during busy holiday weeks. Portion dough into 1-inch balls and freeze on a tray to bake fresh batches. Label containers with baking dates and expected cooling times. For workweek treats, slice and bake a small tray in the evening and store cooled cookies in a resealable container for midday snacks during the next few days.
These peppermint swirl cookies are a joyful combination of easy technique and eye-catching results. Whether you bake them for family, gifts, or a cozy night in, they reward a little planning with big smiles at the first minty bite. Happy baking—and don’t forget to save a few for yourself!
Pro Tips
Use gel coloring to avoid thinning the dough while achieving bright, concentrated color.
Chill the joined logs for at least one hour to ensure clean slices and defined swirls.
Measure flour by spooning into the cup and leveling to avoid dense cookies from too much flour.
Cut cookies cold for the cleanest edges; warm dough will smear the swirl.
This nourishing peppermint swirl cookies recipe is sure to be a staple in your kitchen. Enjoy every moist, high protein slice — it is perfect for breakfast or as a wholesome snack any time.
FAQs about Recipes
Can I freeze the dough?
Yes. Unbaked chilled logs freeze well for up to 3 months. Thaw slightly before slicing and add a minute or two to the bake time.
How long do they keep?
Store cooled cookies in an airtight container at room temperature for up to 5 days or freeze for up to 3 months.
Tags
Peppermint Swirl Cookies
This Peppermint Swirl Cookies recipe makes perfectly juicy, tender, and flavorful steak every time! Serve with potatoes and a side salad for an unforgettable dinner in under 30 minutes.
Ingredients
Cookies
Instructions
Preheat and prepare
Preheat oven to 350°F (175°C) and line baking sheets with parchment or silicone mats. Gather tools and ingredients so the process moves quickly once the dough is ready.
Cream butter and sugar
Beat softened butter and granulated sugar until pale and fluffy, 2–3 minutes, scraping the bowl to ensure even creaming and trapped air for tenderness.
Add wet ingredients
Beat in the egg, vanilla, and peppermint extract until incorporated; avoid overmixing once the egg is added to prevent toughness.
Mix dry ingredients and combine
Whisk flour, baking powder, and salt. Add to the butter mixture in two additions on low speed, mixing until just combined to keep cookies tender.
Divide and color
Divide dough into two portions. Knead a few drops of red gel into the smaller portion to create ribbons of color—do not fully homogenize.
Form and chill logs
Roll each portion into 2-inch logs, press side-by-side, wrap tightly in plastic, and chill for at least 1 hour until firm.
Slice, coat, and bake
Slice chilled logs into 1/4–1/3-inch rounds, press into coarse sugar or crushed candy, arrange on sheets 1 inch apart, and bake 9–11 minutes until edges set.
Cool and store
Cool on the sheet for 3 minutes, transfer to a wire rack to cool completely, then store in an airtight container at room temperature for up to 5 days.
Last Step: Please leave a rating and comment letting us know how you liked this recipe! This helps our business to thrive and continue providing free, high-quality recipes for you.
Nutrition
Did You Make This?
Leave a comment & rating below or tag
@yummyhues on social media!
Categories:
You might also like...
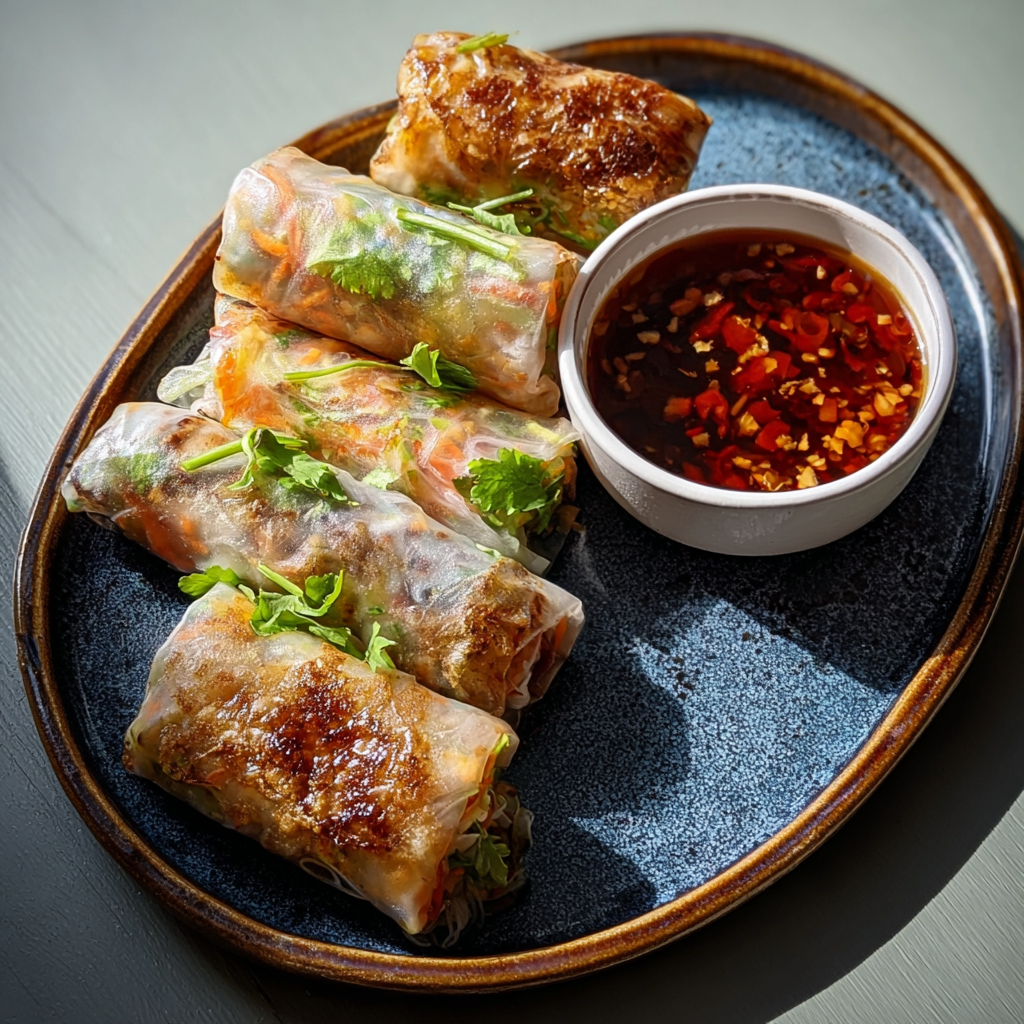
Air-Fried Rice Paper Noodle Rolls
Light, crisp rice paper rolls filled with vermicelli, tofu or shrimp and vibrant vegetables—air-fried to golden perfection for a healthy, speedy snack or appetizer.
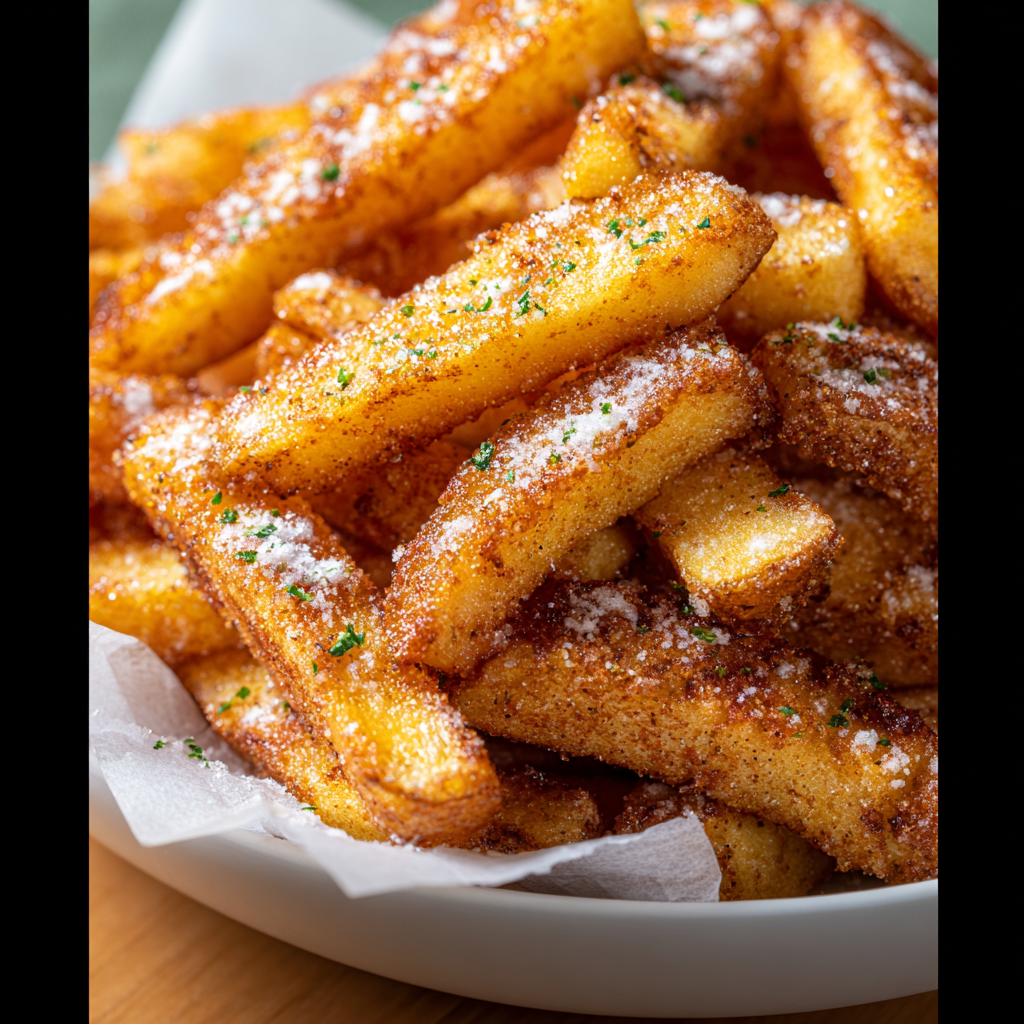
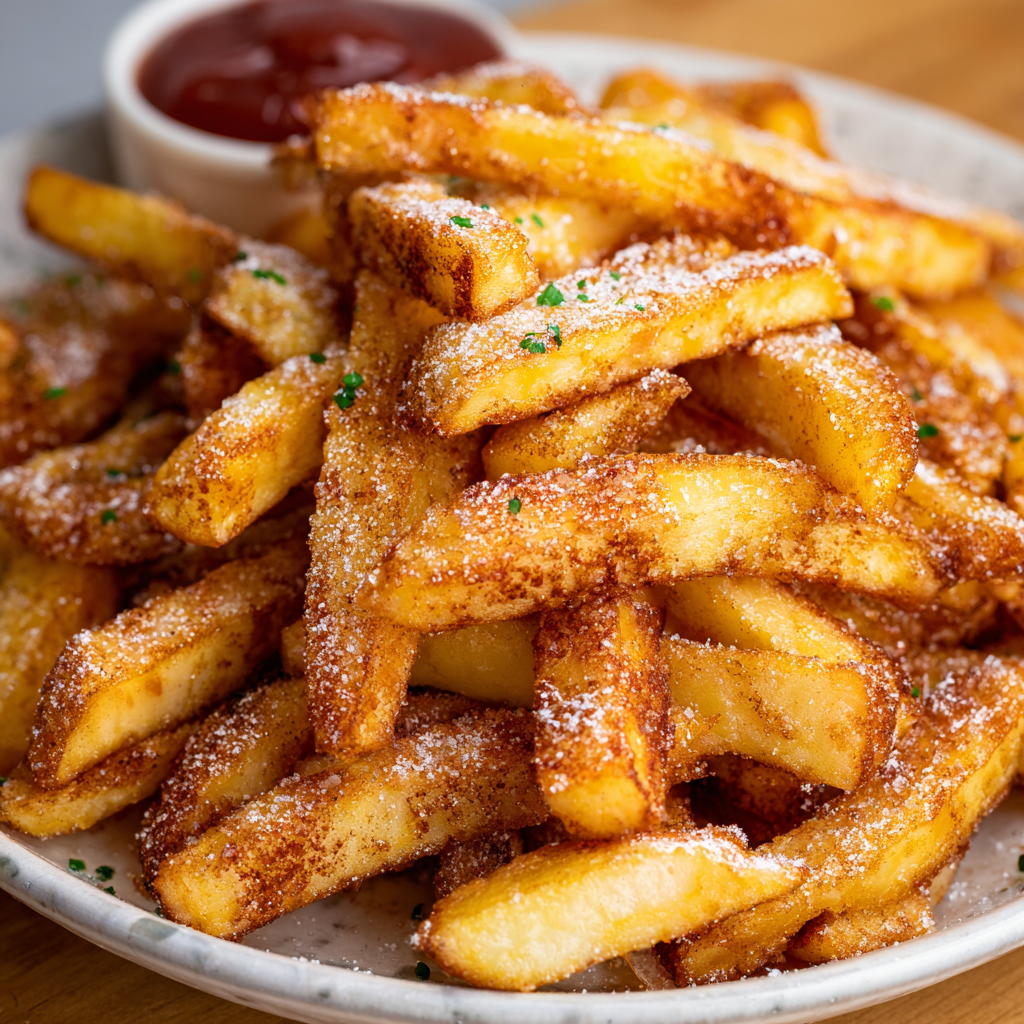
Air Fryer Apple Fries
Crispy, lightly sweet apple sticks coated in panko and cinnamon, ready in minutes from the air fryer. A simple, family friendly snack or dessert.
Air Fryer Apple Fries
Crispy, cinnamon-kissed apple sticks air-fried to golden perfection — a quick snack that tastes like dessert, but feels delightfully fresh.
Did You Make This?
Leave a comment & rating below or tag @yummyhues on social media!
Rate This Recipe
Share This Recipe
Enjoyed this recipe? Share it with friends and family, and don't forget to leave a review!
Comments (1)
This recipe looks amazing! Can't wait to try it.
Comments are stored locally in your browser. Server comments are displayed alongside your local comments.
Hi, I'm Chloe!
What's Popular
30-Minute Meals!
Join to receive our email series which contains a round-up of some of our quick and easy family favorite recipes.