
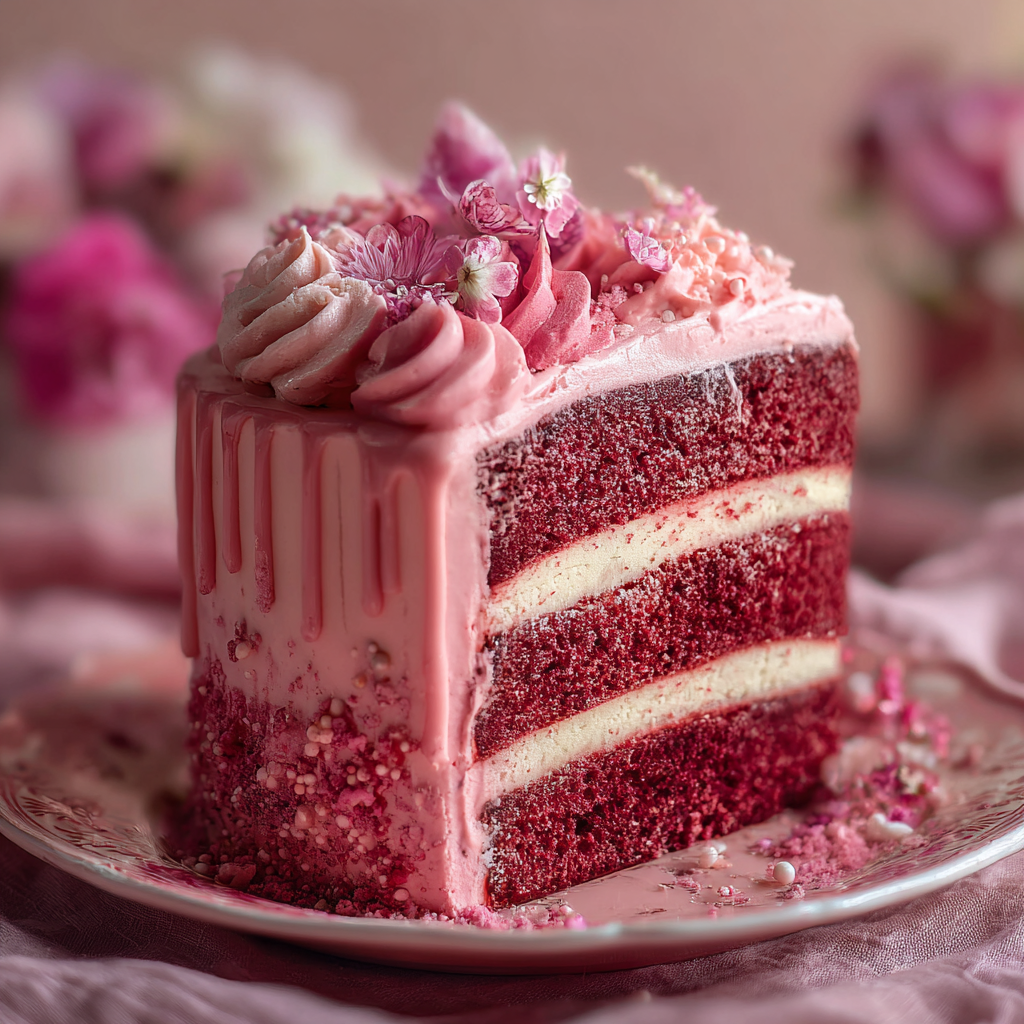
Pink Velvet Cake

A tender, moist pink velvet layer cake with a tangy cream cheese finish — perfect for celebrations, showers, and anytime you want a show-stopping dessert.
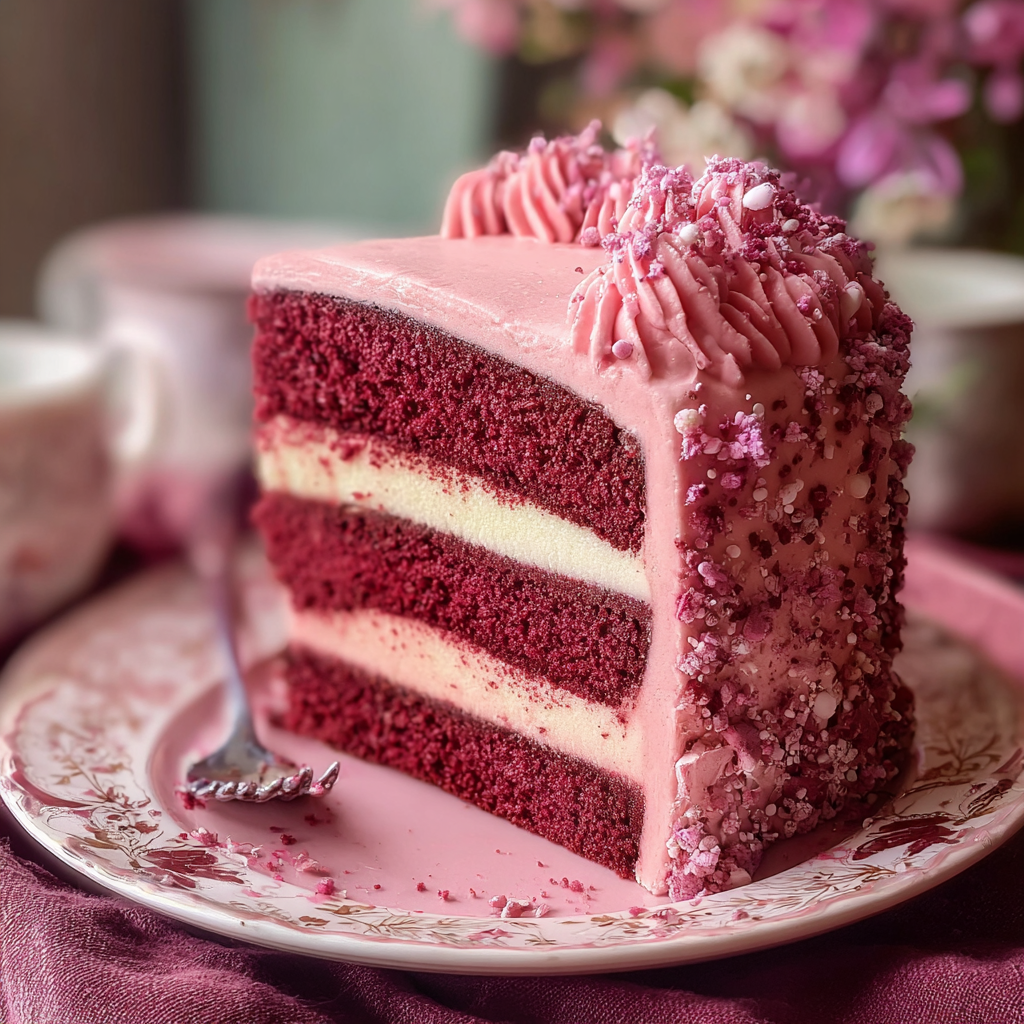
This pink velvet cake has been my go-to for birthdays, baby showers, and impulse-bake celebrations for years. I first developed this version when a close friend asked for a softer, less chocolate-forward alternative to classic red velvet. The result kept the tender crumb and subtle cocoa whisper of red velvet but introduced a gentler pink hue and a brighter cream cheese finish that made every slice feel like a small celebration. The cake holds moisture beautifully, thanks to buttermilk and oil, and the crumb pulls apart in soft, even layers that take frosting well without crumbling.
I remember testing the recipe at midnight with the kitchen light on and a bowl of electric mixer beaters whirring while my dog snored at my feet. The first batch came out perfectly: even rise, a delicate crumb, and a tangy-sweet frosting that contrasted the cake without overpowering it. Serving it warm to my family, I watched my niece take a bite and close her eyes like it was the best cake she’d ever eaten. That memory — the quiet of the kitchen, the small applause of family — is why I keep this recipe in heavy rotation. It’s reliable, adaptable, and always pretty on the dessert table.
Why You'll Love This Recipe
- Delivers a tender, moist crumb thanks to a combination of vegetable oil and buttermilk that keeps the cake soft for days without refrigeration.
- Uses easily sourced pantry staples and natural pink coloring options, so you won’t need specialty ingredients to get that lovely blush hue.
- Quick to assemble with a single-bowl wet mix and a separate dry mix — ready to bake in about 30 minutes and perfect for last-minute celebrations.
- Cream cheese finish balances the cake’s gentle cocoa notes, offering bright tanginess and a silky texture that’s crowd-pleasing.
- Make-ahead friendly: layers freeze well and frosting can be prepared up to 48 hours in advance to save time on the event day.
- Customizable color and decorations allow you to adapt this to gender reveals, bridal showers, or a simple everyday treat.
On more than one occasion I’ve swapped pink for coral or muted rose and paired the cake with fresh berries. Family and friends often ask for this cake when they crave something prettier than vanilla but less dense than chocolate. It’s become a staple whenever we want something festive yet unfussy — imagine layered soft sponge with cloud-like frosting and a little shimmer of edible pearls on top.
Ingredients
- Cake: All-purpose flour — 2 1/2 cups (measured properly using the spoon-and-level method); provides structure while keeping the crumb tender when balanced with sufficient fat and liquid. Use King Arthur or Gold Medal for consistent results.
- Cake: Sugar — 1 3/4 cups granulated; dissolves into the batter to sweeten evenly and promote moistness. Cane sugar gives a neutral sweetness; superfine sugar will blend faster if you want an extra-fine crumb.
- Cake: Cocoa powder — 2 tablespoons unsweetened, sifted; provides just a hint of chocolate complexity. Use natural unsweetened for classic flavor.
- Cake: Baking soda & salt — 1 teaspoon baking soda and 1/2 teaspoon fine salt; work with the acidic buttermilk to give lift and balance.
- Cake: Buttermilk — 1 cup at room temperature; the acid tenderizes gluten for a soft crumb. If unavailable, make a substitute with 1 tablespoon white vinegar plus milk to 1 cup.
- Cake: Vegetable oil — 3/4 cup; keeps the cake moist even on day two. Canola or light olive oil works fine.
- Cake: Eggs — 2 large at room temperature; provide structure and richer flavor.
- Cake: Vanilla extract — 2 teaspoons; rounds out flavors and enhances aroma.
- Cake: Pink coloring — 1 to 1 1/2 teaspoons gel food coloring or 2 tablespoons beet puree for a natural option; gel offers more color with less liquid.
- Frosting: Cream cheese — 8 ounces, softened to room temperature; ensures a smooth, tangy finish. Use full-fat for best texture.
- Frosting: Unsalted butter — 1/2 cup (1 stick), softened; lightens and stabilizes the cream cheese for spreading.
- Frosting: Powdered sugar — 3 to 3 1/2 cups, sifted as needed; sweetens and creates structure. Adjust to taste for consistency.
- Frosting: Vanilla extract — 1 teaspoon; balances tang and sweetness.
- Optional garnishes: Fresh berries, sprinkles, edible pearls, or a dusting of freeze-dried raspberry powder for color and texture.
Instructions
Preheat and Prepare Pans: Preheat the oven to 350°F. Grease two 9-inch round pans and line the bottoms with parchment. Greasing the sides and lining the base ensures clean release. Rack placement should be centered for even heat circulation. Mix Dry Ingredients: Whisk together 2 1/2 cups flour, 1 3/4 cups sugar, 2 tablespoons cocoa, 1 teaspoon baking soda, and 1/2 teaspoon salt in a large bowl. Sifting is optional but recommended if your cocoa or flour is lumpy; it helps an even rise and uniform crumb. Combine Wet Ingredients: In a separate bowl, whisk 1 cup buttermilk, 3/4 cup vegetable oil, 2 large eggs, 2 teaspoons vanilla, and the pink coloring until fully combined. Room-temperature liquids emulsify better, leading to a smoother batter and even rise. Finish the Batter: Pour wet into dry and fold gently until combined. Overmixing develops gluten and yields a tougher crumb; stop when no streaks of flour remain. Divide evenly between prepared pans — use a scale for precision if you have one. Bake: Bake at 350°F for 22 to 26 minutes, rotating pans halfway through if your oven runs hot. Cakes are done when the tops spring back lightly and a toothpick inserted near the center comes out with a few moist crumbs. Cool and Level: Let layers cool 10 minutes in the pans, then invert onto a rack. After they reach room temperature, level the domes with a serrated knife for even stacking. Cooling completely before frosting prevents melting and sliding. Make the Finish: Beat 8 ounces softened cream cheese with 1/2 cup softened butter until silky, then gradually add 3 to 3 1/2 cups powdered sugar and 1 teaspoon vanilla. Adjust consistency with more sugar for stiffer spreading or a splash of cream for softer. Assemble: Place the first layer on a cake board or plate, spread an even layer of frosting, top with the second cake, and crumb-coat. Chill briefly, then apply a final coat and decorate. Chill the finished cake 30 minutes to set if you plan to pipe or add delicate decorations.
You Must Know
- Store at room temperature for up to 24 hours in a cool environment; refrigerate for longer storage because of the cream cheese finish.
- Layers freeze well wrapped tightly for up to 3 months; thaw in the refrigerator overnight before frosting.
- This cake is moderate in sweetness but higher in fat due to oil and cream cheese; a small slice delivers satisfying indulgence.
- For the truest pink, use gel coloring; natural beet puree yields delicate rose tones and a subtle earthy note.
My favorite aspect is how forgiving this formula is. I’ve had days when the oven behaves oddly — one layer domed, the other barely rose — and the cake still assembled beautifully after leveling and a smoothing crumb coat. Guests often compliment the balance between the gentle cocoa undertone and the bright finish. Decorating is where I indulge my playful side: fresh flowers, berry accents, and a sprinkle of edible shimmer turn a simple bake into a centerpiece.
Storage Tips
For short-term serving, keep the cake at cool room temperature covered loosely with a cake dome for up to 24 hours. Because the finish contains cream cheese, refrigeration is recommended if the room temperature exceeds 70°F or for longer storage. Store slices in an airtight container to prevent drying; they will keep 3 to 4 days in the refrigerator. For long-term storage, freeze unfrosted layers wrapped tightly in plastic and foil for up to 3 months. Thaw frozen layers in the refrigerator overnight, then let them reach room temperature before frosting to avoid condensation on the crumb.
Ingredient Substitutions
If you’re avoiding dairy, substitute buttermilk with a plant-based milk plus 1 tablespoon lemon juice and use dairy-free cream cheese and vegan butter for the finish; note texture will be slightly different and tang will be muted. For a lower-sugar treat, reduce powdered sugar in the finish by 1/2 cup and add 1 teaspoon cornstarch to stabilize; sweetness will be subtler. To replace eggs in a pinch, use two flax eggs (2 tablespoons ground flaxseed mixed with 6 tablespoons water, chilled) but expect a slightly denser crumb. For natural coloring, beet puree gives a beautiful tone but adds moisture; reduce another tablespoon of buttermilk to compensate.
Serving Suggestions
Serve slices with lightly sweetened whipped cream and fresh raspberries for contrast, or pair with a tart lemon curd spread on the plate for an elevated restaurant feel. For celebrations, top with edible flowers and pearl sprinkles for elegance. This cake also pairs nicely with a robust black tea or a light-bodied coffee; if serving after a heavy meal, offer petite slices to balance indulgence with portion control. For brunch, cut into smaller squares and serve alongside fruit salad and champagne or sparkling water for a balanced spread.
Cultural Background
The pink velvet variation traces its roots to the classic red velvet, an American favorite with history connected to the early 20th century and the distinct interplay of cocoa and acidic components. Traditional red velvet was celebrated for its unique texture and slight tang from buttermilk and vinegar. Over time, bakers experimented with color and tone, softening the crimson to pink to suit modern tastes, celebrations, and themed parties. This lighter color variant preserves the gentle cocoa note while leaning into pastel palettes popular for modern entertaining.
Seasonal Adaptations
In spring and summer, brighten the finish with a berry compote between layers and garnish with fresh flowers or sliced strawberries. For winter festivities, add a pinch of warm spices like cinnamon and a splash of orange zest to the batter for seasonal depth. On Valentine’s Day swap the natural coloring for a slightly deeper hue and add a ribbon of raspberry jam between layers for an extra romantic touch. For holiday table settings, top with sugared cranberries and rosemary sprigs for a festive impression.
Meal Prep Tips
Prepare frosting up to 48 hours ahead and store airtight in the refrigerator; bring to room temperature and re-whip briefly before using. Bake the layers a day ahead, wrap well, and store at room temperature under a cake dome to retain moisture. For grab-and-go portions, slice the finished cake into squares and store in individual airtight containers; these keep well in the fridge for 3 days. Use disposable cake boards and insulated carriers when transporting to events to prevent shifting and preserve presentation.
Make this cake your own: tweak colors, add citrus, or keep it classic. There is a quiet joy in pulling a soft, pastel cake from the oven and seeing faces light up. I hope this version becomes part of your celebration toolkit — simple enough for a weekday treat, elegant enough for a party. Happy baking from Yummy Hues!
Pro Tips
Use room-temperature eggs and buttermilk for better emulsification and a consistent rise.
Measure flour using the spoon-and-level method to avoid a dry, dense crumb.
Chill the crumb coat before applying the final finish to minimize crumbs in the final appearance.
If using beet puree for color, reduce other liquids by 1 tablespoon to compensate for added moisture.
This nourishing pink velvet cake recipe is sure to be a staple in your kitchen. Enjoy every moist, high protein slice — it is perfect for breakfast or as a wholesome snack any time.
FAQs about Recipes
Can I freeze the layers ahead of time?
Yes. Unfrosted layers freeze wrapped tightly for up to 3 months. Thaw overnight in the refrigerator before frosting.
What’s the best way to get that pink color?
Use gel food coloring for the most vibrant pink with the least liquid. Natural beet puree works but will add moisture.
Tags
Pink Velvet Cake
This Pink Velvet Cake recipe makes perfectly juicy, tender, and flavorful steak every time! Serve with potatoes and a side salad for an unforgettable dinner in under 30 minutes.
Ingredients
Cake
Frosting
Instructions
Preheat and Prepare Pans
Preheat the oven to 350°F. Grease two 9-inch round pans and line the bottoms with parchment. Greasing the sides and lining the base ensures clean release and even browning.
Mix Dry Ingredients
Whisk together flour, sugar, cocoa powder, baking soda, and salt in a large bowl. Sifting is optional but helps ensure even distribution.
Combine Wet Ingredients
In a separate bowl, whisk together buttermilk, vegetable oil, eggs, vanilla, and pink coloring until combined. Room-temperature liquids give a smoother emulsion.
Finish the Batter
Pour wet ingredients into dry and fold gently until there are no streaks of flour. Overmixing can lead to a dense crumb. Divide batter evenly between pans.
Bake
Bake at 350°F for 22 to 26 minutes. Rotate pans halfway through if necessary. Cakes are done when the tops spring back lightly and a toothpick comes out with moist crumbs.
Cool and Level
Cool in pans 10 minutes, then invert to a rack. After layers reach room temperature, level the tops with a serrated knife for even stacking.
Prepare Finish and Assemble
Beat cream cheese and butter until silky, add powdered sugar and vanilla, adjust consistency, assemble layers with an even layer of finish between them, crumb-coat, chill briefly, and then apply the final coat.
Last Step: Please leave a rating and comment letting us know how you liked this recipe! This helps our business to thrive and continue providing free, high-quality recipes for you.
Nutrition
Did You Make This?
Leave a comment & rating below or tag
@yummyhues on social media!
Categories:
You might also like...
Air-Fried Rice Paper Noodle Rolls
Light, crisp rice paper rolls filled with vermicelli, tofu or shrimp and vibrant vegetables—air-fried to golden perfection for a healthy, speedy snack or appetizer.
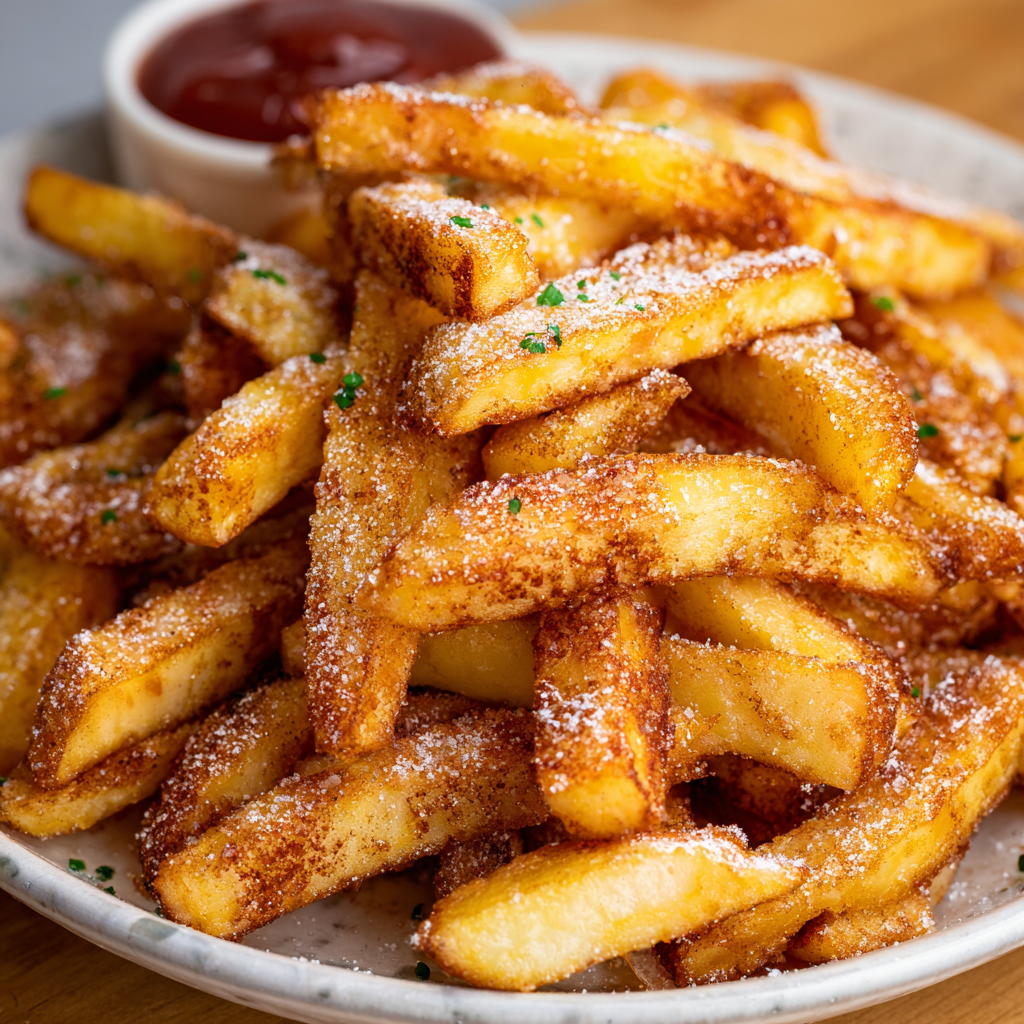
Air Fryer Apple Fries
Crispy, lightly sweet apple sticks coated in panko and cinnamon, ready in minutes from the air fryer. A simple, family friendly snack or dessert.
Air Fryer Apple Fries
Crispy, cinnamon-kissed apple sticks air-fried to golden perfection — a quick snack that tastes like dessert, but feels delightfully fresh.
Did You Make This?
Leave a comment & rating below or tag @yummyhues on social media!
Rate This Recipe
Share This Recipe
Enjoyed this recipe? Share it with friends and family, and don't forget to leave a review!
Comments (1)
This recipe looks amazing! Can't wait to try it.
Comments are stored locally in your browser. Server comments are displayed alongside your local comments.
Hi, I'm Chloe!
What's Popular

30-Minute Meals!
Join to receive our email series which contains a round-up of some of our quick and easy family favorite recipes.