
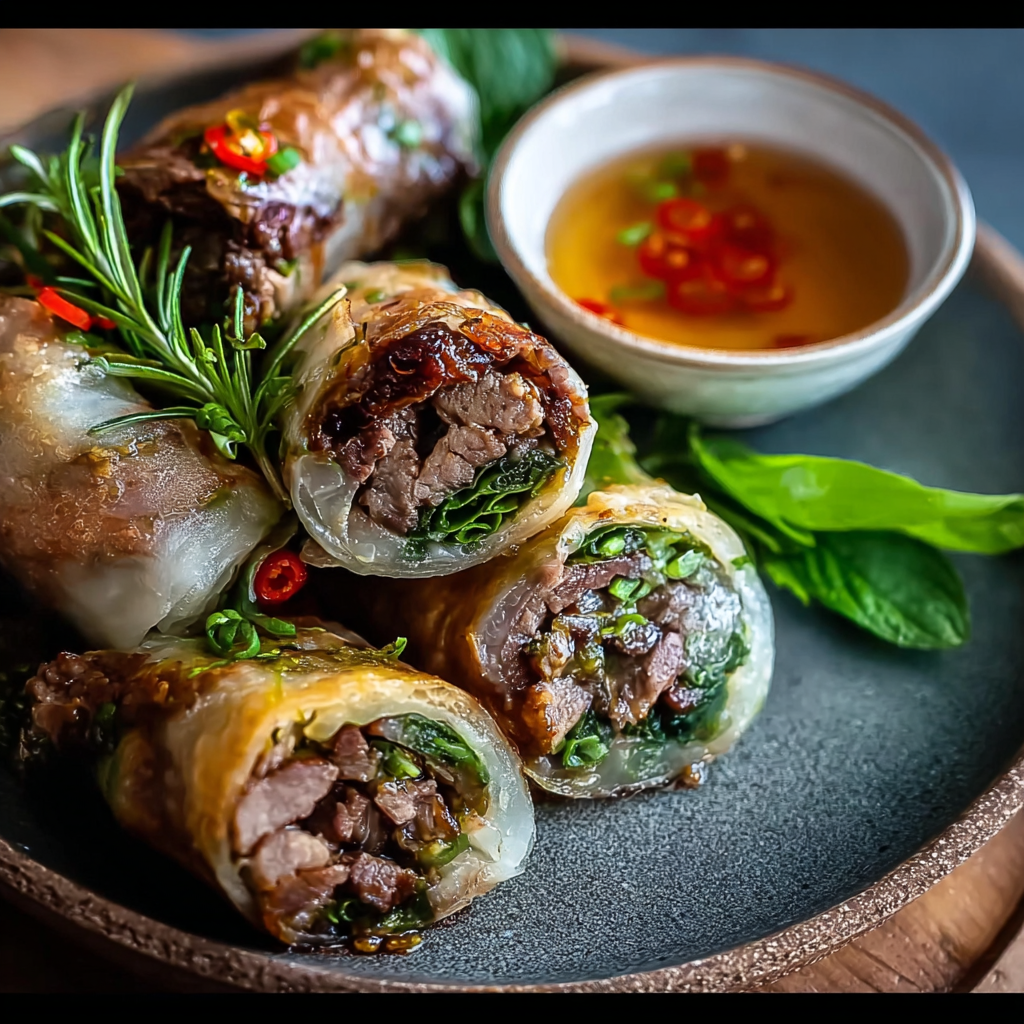
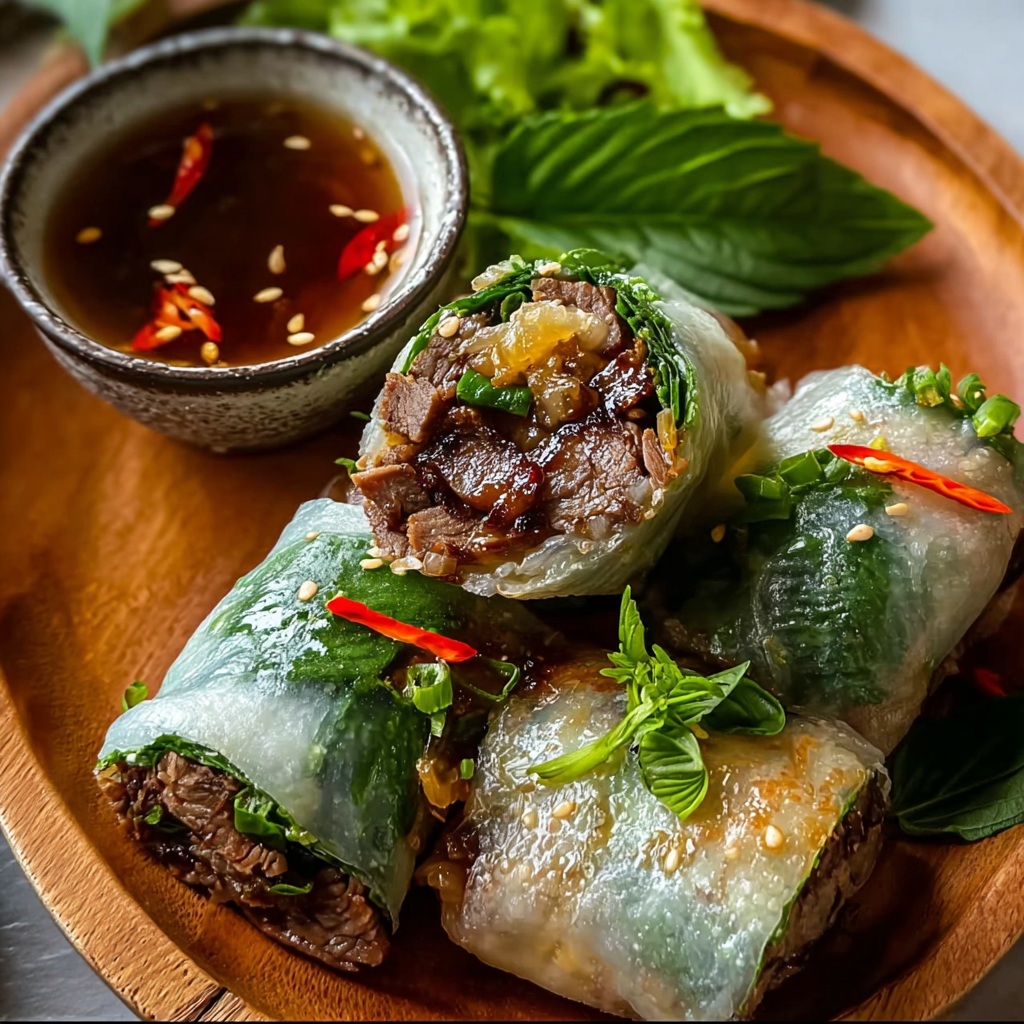
Thai Basil Beef Roll

Savory ground beef with fresh Thai basil and crisp bell pepper wrapped in rice paper, pan-fried until golden — a quick, crowd-pleasing appetizer or light dinner.
This Thai basil beef roll has been a surprising favorite in my kitchen ever since I first adapted it from a street-food style snack into something I could make at home on a weeknight. I discovered the combination on a busy evening when I had a pound of ground beef and a generous bunch of Thai basil in the fridge. The fragrant leaves, bright bell pepper, and the snap of pan-fried rice paper came together into something that tasted both comforting and vibrantly fresh. It’s become a go-to for casual gatherings and a reliable way to clear plates during family dinners.
What makes this version special is the balance between fast, straightforward technique and attention to small details: browning the beef to develop caramelized flavor, adding the soy at just the right moment so it penetrates without drying the meat, and folding in lots of Thai basil at the end to preserve its perfume. The rice paper, when briefly soaked and then pan-fried seam-side down, becomes crisp and slightly blistered, providing a delightful contrast to the juicy filling. I love that the whole process fits into a short window of time but still produces impressive texture and aroma.
Why You'll Love This Recipe
- Bright, herbal flavor from fresh Thai basil pairs with savory browned beef for an addictive balance of taste and aroma.
- Quick to make: active prep is under 20 minutes and you can have hot rolls ready in about 30 minutes total.
- Uses pantry-friendly staples like rice paper and soy sauce — no need for specialty equipment or long marinating.
- Flexible: make-ahead the filling and assemble or pan-fry just before serving for a fresh finish.
- Crowd-pleasing finger food that works as an appetizer, snack, or light main when paired with a salad or rice.
- Customizable for dietary needs — swap soy for tamari to reduce gluten, or use leaner beef to change fat content.
I still remember the first time I brought these to a small dinner: everyone kept asking what the secret was. The basil aroma filled the room the moment I opened the skillet. My sister commented that the rice paper was like a thin, crisp umbrella holding all the flavors together — and that became our running joke. They’re simple, fast, and leave a lasting impression.
Ingredients
- Ground beef (1 pound): Choose 80/20 or 85/15 depending on how rich you want the filling; fattier blends brown more deeply and stay juicier. If you prefer leaner, 90/10 works but watch for dryness and consider a splash of oil when browning.
- Fresh Thai basil (2 cups, loosely packed): Look for small, fragrant leaves rather than large sweet basil; Thai basil has a slight anise-licorice note that brightens the filling. Rinse and pat dry before using.
- Bell pepper (1 medium): Thinly sliced for a crisp contrast; red or yellow peppers add sweetness and color. Seed and slice into matchsticks about 1/8 to 1/4 inch thick.
- Soy sauce (1 tablespoon): Regular soy sauce adds umami and seasoning — use reduced-sodium if preferred. To make gluten-free, substitute an equal amount of tamari.
- Rice paper wrappers (1 package): Most packages contain 10–12 sheets; each sheet becomes one roll. Keep wrappers covered with a damp towel while assembling to prevent drying.
- Neutral oil (for pan-frying, 1–2 tablespoons): Use vegetable or canola oil with a high smoke point so the wrappers blister evenly without burning.
Instructions
Prepare the Filling: Heat a large skillet over medium heat. Add the ground beef and break it apart with a spatula. Cook for about 5 minutes until the meat is evenly browned and no longer pink, stirring occasionally so it caramelizes in spots but does not dry out. If using very lean beef, add 1 teaspoon of oil to help with browning. Add Flavor and Vegetables: Stir in 1 tablespoon soy sauce and the thinly sliced bell pepper. Cook for an additional 2–3 minutes so the pepper softens slightly but keeps some crunch. Taste and add a pinch of salt only if needed — soy sauce supplies a good amount of seasoning. Finish with Basil: Remove the skillet from the heat and immediately fold in the fresh Thai basil leaves. The residual heat wilts them just enough to release aroma without turning them limp. Set the filling aside to cool for 5–7 minutes so it’s comfortable to handle. Soak Rice Paper: Fill a shallow dish or pie plate with warm water. Submerge one rice paper wrapper for 10–15 seconds; it should soften and become pliable but not overly floppy. Lay it on a clean, damp work surface to assemble. Assemble Rolls: Spoon about 2–3 tablespoons of the filling onto the lower third of the softened wrapper. Fold the bottom edge up over the filling, tuck in the sides, then roll tightly toward the top to seal. Keep assembled rolls covered with a damp towel until ready to cook. Pan-Fry to Finish: In the same skillet, add 1–2 tablespoons neutral oil and heat over medium-high. Place rolls seam-side down and cook until golden and crisp, about 2–3 minutes per side. Rotate carefully with tongs to brown evenly. Transfer to a paper-towel–lined plate to drain briefly. Serve: Let rolls cool 1 minute, then serve warm with your favorite dipping sauce, such as sweet chili sauce or a soy-lime dipping blend.
You Must Know
- This preparation stores well: filled but un-fried rolls keep in the refrigerator for up to 24 hours; pan-fried rolls are best eaten the same day but freeze well for up to 3 months.
- High in protein from the beef and moderate in carbohydrates from the rice paper; swap to leaner beef to reduce fat content.
- If you need gluten-free, replace soy sauce with tamari; for lower sodium, use reduced-sodium soy and taste before adding salt.
- These rolls are quick to scale for a party: double the filling and set up an assembly line for efficient rolling.
- Use a shallow pan to pan-fry so you get even browning without needing deep oil. A nonstick or well-seasoned skillet works best.
My favorite part is the contrast: the blistered, crisp wrapper against the juicy, herb-flecked filling. At a recent summer potluck my neighbor declared them the best thing on the table — that kind of reaction makes the short prep time feel like a great return on effort. Make them once and you’ll find yourself adjusting quantities to suit your crowd.
Storage Tips
Filled but uncooked rolls keep best in the refrigerator for up to 24 hours when placed in a single layer and covered with a damp paper towel and plastic wrap — this prevents the rice paper from drying out. Pan-fried rolls can be refrigerated in an airtight container for 2–3 days; reheat in a 350°F oven for 8–10 minutes to restore crispness. For longer storage, freeze cooked rolls on a tray until solid, then transfer to a freezer bag for up to 3 months. Reheat from frozen in a 375°F oven for 12–15 minutes, flipping halfway through.
Ingredient Substitutions
If you don’t have Thai basil, use a combination of sweet basil and a small pinch of fresh mint to mimic the sweet-anis notes. For a gluten-free version, replace soy sauce with tamari or coconut aminos in equal measure. Swap ground beef for ground turkey or ground pork for a different flavor profile; if using very lean turkey, add a teaspoon of oil when browning to maintain juiciness. To make vegetarian, use crumbled firm tofu or cooked lentils, and increase seasoning with a dash of sesame oil and a tablespoon of hoisin for depth.
Serving Suggestions
Serve warm with sweet chili sauce, a simple soy-lime dip (2 tablespoons soy sauce, 1 tablespoon lime juice, 1 teaspoon sugar, pinch of chili flakes), or hoisin-peanut sauce for richness. For a light meal, pair the rolls with a crisp cucumber salad and jasmine rice. Garnish with extra Thai basil leaves and thinly sliced scallions for color. At parties, present them on a platter lined with banana leaf or lettuce and provide small dipping bowls so guests can customize flavors.
Cultural Background
Rice-paper–wrapped snacks are common across Southeast Asia, with regional variations in fillings and techniques. These rolls borrow from Vietnamese-style rice paper wraps and Thai flavor profiles by featuring Thai basil. In street-food contexts, aromatic herbs like Thai basil, cilantro, and mint are used to brighten rich or savory fillings. This recipe is a home-friendly adaptation that honors the balance of fresh herbs, savory meat, and textural contrast.
Seasonal Adaptations
In summer, use the ripest bell peppers and an abundance of basil right from the garden for peak brightness. In cooler months, substitute a splash of fish sauce and a handful of chopped roasted peanuts for warmth and texture. For holiday gatherings, add finely diced water chestnuts for crunch and a touch of grated ginger to the filling for aromatic depth. These small swaps keep the core technique while adapting flavors to the season.
Meal Prep Tips
Prepare the filling up to 2 days in advance and refrigerate. At serving time, reheat gently in a skillet, then assemble and pan-fry rolls to ensure wrappers remain crisp. For efficient meal prep, pre-slice peppers and wash basil leaves; set up an assembly station with a shallow bowl of warm water, a damp towel, and a tray for finished rolls. This method saves time and keeps the final cooking step quick and satisfying.
These Thai basil beef rolls are proof that small technique choices — timing the basil, soaking wrappers briefly, and using medium-high heat to blister the surface — make a big difference. They’re versatile, quick, and always welcome at my table. Try them once, then make them your own.
Pro Tips
Do not soak rice paper more than 15 seconds; it should remain slightly firm so it seals during rolling and crisps when pan-fried.
Fold in the basil off the heat to preserve the herb’s aroma and bright color.
Use medium-high heat for pan-frying so the wrapper blisters and crisps quickly without absorbing too much oil.
Keep assembled rolls covered with a damp towel to prevent drying before frying.
If you want more caramelization on the beef, let it sit still in the pan for 30–60 seconds before stirring during the browning stage.
This nourishing thai basil beef roll recipe is sure to be a staple in your kitchen. Enjoy every moist, high protein slice — it is perfect for breakfast or as a wholesome snack any time.
Tags
Thai Basil Beef Roll
This Thai Basil Beef Roll recipe makes perfectly juicy, tender, and flavorful steak every time! Serve with potatoes and a side salad for an unforgettable dinner in under 30 minutes.
Ingredients
Filling
Assembly
Instructions
Brown the Beef
Heat a large skillet over medium heat and add the ground beef. Break it up and cook about 5 minutes until evenly browned and any liquid has evaporated. For lean beef, add 1 teaspoon oil to aid browning.
Add Soy and Peppers
Stir in 1 tablespoon soy sauce and add the thinly sliced bell pepper. Cook 2–3 minutes until peppers soften slightly but retain some crunch.
Fold in Basil
Remove the skillet from heat and fold in 2 cups fresh Thai basil leaves so they wilt but keep aroma. Set filling aside to cool for 5–7 minutes.
Soak Rice Paper
Fill a shallow dish with warm water and submerge one rice paper for 10–15 seconds until pliable. Lay on a damp surface to assemble.
Assemble Rolls
Spoon 2–3 tablespoons filling onto the lower third of the wrapper, fold the bottom up, tuck in sides, and roll tightly to seal. Keep assembled rolls under a damp towel.
Pan-Fry Rolls
Heat 1–2 tablespoons neutral oil in the skillet over medium-high. Place rolls seam-side down and fry 2–3 minutes per side until golden and crisp. Drain briefly on paper towels and serve warm.
Last Step: Please leave a rating and comment letting us know how you liked this recipe! This helps our business to thrive and continue providing free, high-quality recipes for you.
Nutrition
Did You Make This?
Leave a comment & rating below or tag
@yummyhues on social media!
Categories:
You might also like...
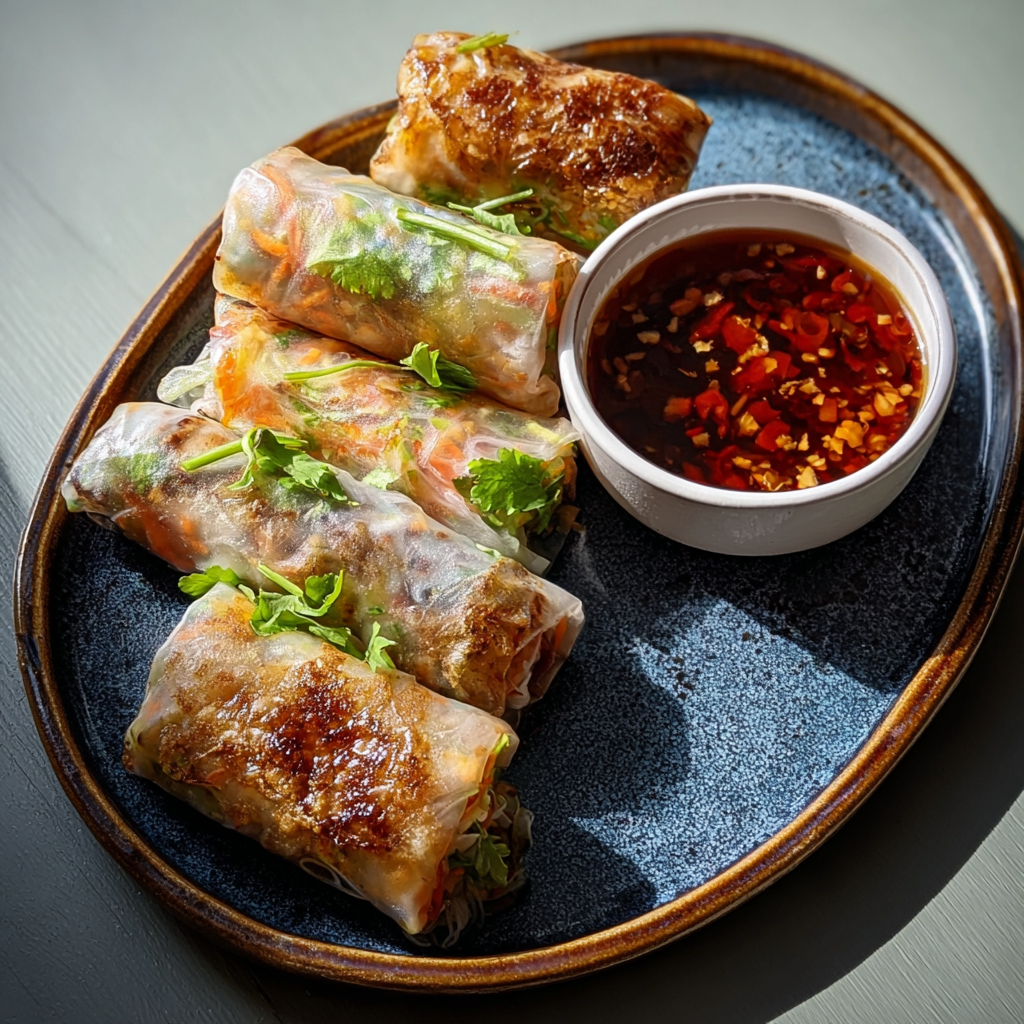
Air-Fried Rice Paper Noodle Rolls
Light, crisp rice paper rolls filled with vermicelli, tofu or shrimp and vibrant vegetables—air-fried to golden perfection for a healthy, speedy snack or appetizer.
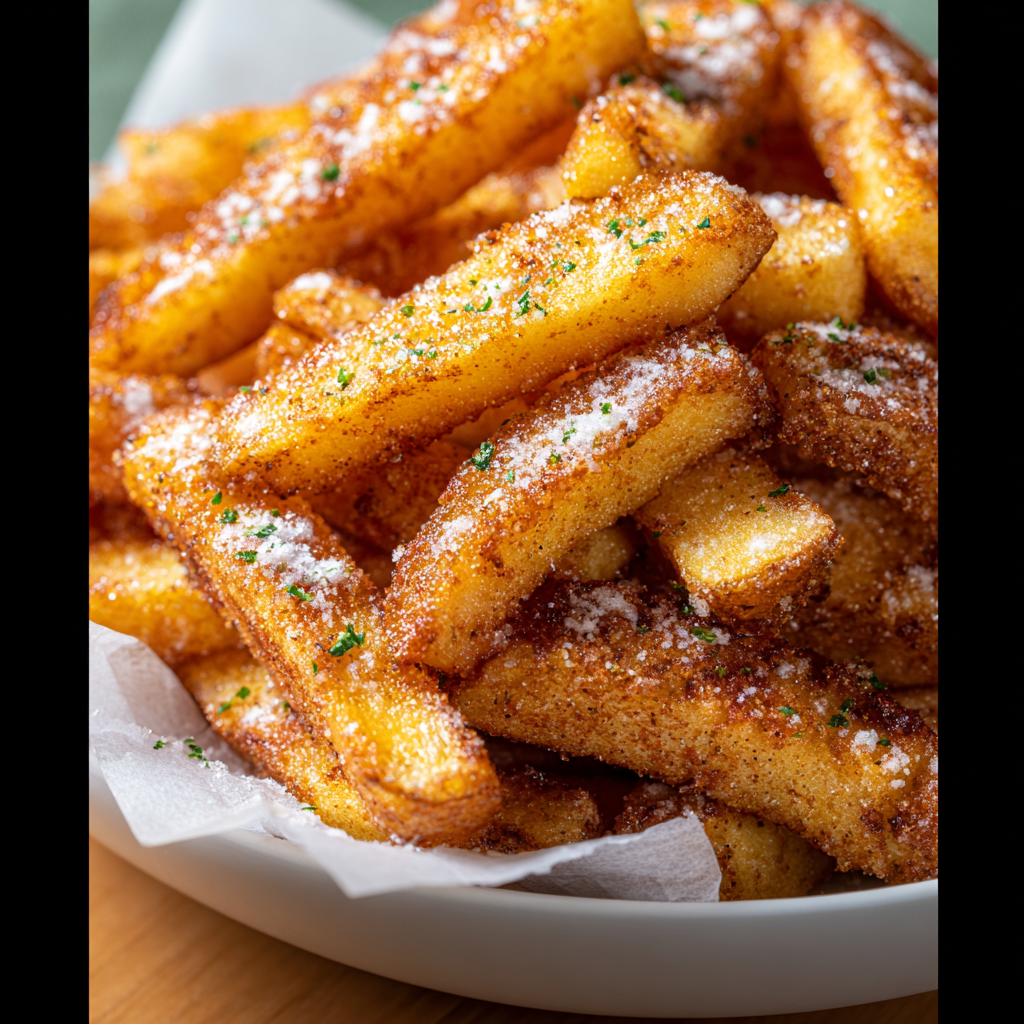
Air Fryer Apple Fries
Crispy, lightly sweet apple sticks coated in panko and cinnamon, ready in minutes from the air fryer. A simple, family friendly snack or dessert.
Air Fryer Apple Fries
Crispy, cinnamon-kissed apple sticks air-fried to golden perfection — a quick snack that tastes like dessert, but feels delightfully fresh.
Did You Make This?
Leave a comment & rating below or tag @yummyhues on social media!
Rate This Recipe
Share This Recipe
Enjoyed this recipe? Share it with friends and family, and don't forget to leave a review!
Comments (1)
This recipe looks amazing! Can't wait to try it.
Comments are stored locally in your browser. Server comments are displayed alongside your local comments.
Hi, I'm Chloe!
What's Popular
30-Minute Meals!
Join to receive our email series which contains a round-up of some of our quick and easy family favorite recipes.